



 yomi@rulecomposite.com




How to use clear casting resin
 May 08, 2026|
 View:560
Clear casting resin has emerged as a versatile material in the realms of art, crafting, industrial design, and even jewelry making. Its transparent, durable, and UV-resistant properties make it ideal for encapsulating objects, creating decorative items, or producing functional parts with precision. Whether you are a hobbyist looking to preserve a floral arrangement or an industrial designer seeking to prototype a complex component, mastering the use of clear casting resin is essential. This guide will walk you through the step-by-step process of using clear casting resin, highlight key considerations, and offer tips to ensure professional-quality results.
Part 1: How to Use Clear Casting Resin
Step 1: Preparation of Materials and Workspace
Before diving into the casting process, thorough preparation is crucial. Start by selecting the appropriate type of clear casting resin for your project. Common options include epoxy resin, polyurethane resin, and polyester resin, each with unique characteristics. For instance, epoxy resin is known for its high durability and UV resistance, while polyurethane resin offers flexibility and impact resistance. Polyester resin, on the other hand, is cost-effective and cures rapidly but may yellow over time under UV exposure.
Once you’ve chosen your resin, gather all necessary tools: graduated mixing cups, stir sticks, a mold (silicone molds are preferred for their flexibility and non-stick properties), protective gear (gloves, goggles, and a respirator), and any embedments or pigments you plan to use. Ensure your workspace is well-ventilated, as resin fumes can be harmful if inhaled in large quantities. The ideal working temperature is between 70–85°F (21–29°C), as extreme temperatures can affect curing time and clarity.
Step 2: Preparing Embedments and Molds
If your project involves embedding objects like flowers, leaves, or photographs, proper preparation is vital. Clean and dry all items thoroughly to prevent air bubbles or moisture from interfering with the curing process. For delicate items like dried flowers, consider sealing them with a thin layer of hairspray or shellac to preserve their shape and color. Paper items like photos should be coated with a clear sealant to prevent ink from bleeding into the resin.
Next, prepare your mold. Apply a mold release agent such as paste wax, spray wax, or PVA (polyvinyl alcohol) to ensure easy demolding later. If you’re using a silicone mold, ensure it’s clean and free of debris. For porous molds, a thin layer of resin applied to the surface and allowed to cure partially can create a non-stick barrier.
Step 3: Mixing the Resin
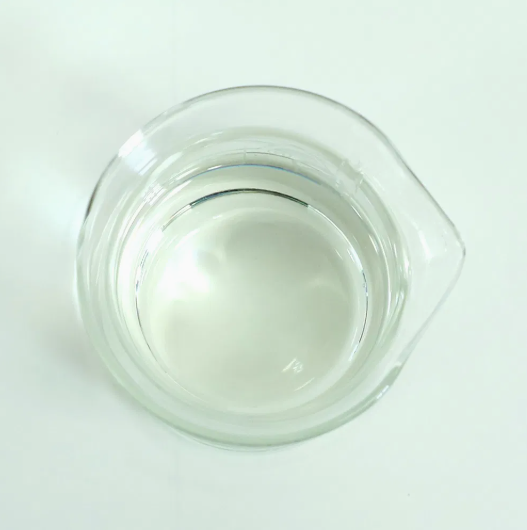
Clear casting resin is typically a two-part system consisting of resin and hardener (or catalyst). Accurate measurement is critical to ensure proper curing. Use graduated mixing cups to measure the resin and hardener in the correct ratio, usually 1:1 by volume or weight, depending on the manufacturer’s instructions. For example, some polyester resins require 0.3–2.0% MEKP (methyl ethyl ketone peroxide) catalyst by weight.
Pour the resin and hardener into a clean mixing cup and stir thoroughly for at least 2–3 minutes, scraping the sides and bottom of the cup to ensure complete blending. Avoid “whipping” the mixture, as this can introduce air bubbles. If you’re adding pigments or dyes, do so during mixing, following the manufacturer’s recommended dosage (typically 1–3% by volume).
Step 4: Pouring the Resin
For thin castings (1/8–1/4 inch thick), pour the resin directly into the mold in a single spot and let it spread naturally to minimize air bubbles. For thicker castings, pour in layers to prevent overheating (exothermic reactions) and uneven curing. Wait until each layer reaches a tacky, “masking tape-like” consistency before adding the next layer. This ensures strong adhesion between layers without the need for sanding.
If you’re embedding objects, pour a small amount of resin into the mold first, place the items carefully, and then pour the remaining resin to cover them. Use a toothpick or stir stick to adjust the position of embedments if needed.
Step 5: Curing and Demolding
Allow the resin to cure according to the manufacturer’s instructions, typically 24–72 hours for full hardness. Avoid disturbing the mold during curing, as this can cause surface imperfections. For larger castings, use an infrared temperature gun to monitor the surface temperature and prevent overheating.
Once cured, gently flex the silicone mold to release the casting. If the resin sticks to the mold, apply a small amount of heat with a hairdryer or heat gun to soften the mold slightly. For rigid molds, use a mold release agent beforehand to facilitate demolding.

Part 2: Key Considerations When Using Clear Casting Resin
1.Avoiding Air Bubbles
Air bubbles are a common challenge in resin casting. To minimize them, mix the resin slowly and deliberately, and pour it from a low height into the mold. For critical projects, consider using a pressure pot or vacuum chamber to remove trapped air. Alternatively, vibrating the mold gently on a vibrating table can help bubbles rise to the surface.
2.Managing Curing Time
Curing time varies based on resin type, hardener ratio, and ambient temperature. Faster-curing resins are ideal for small projects, while slower-curing resins offer more working time for complex castings. Adjust the catalyst ratio (within the manufacturer’s recommended range) to control curing speed. For example, increasing the MEKP catalyst in polyester resin shortens pot life but accelerates curing.
3.Preventing Yellowing
UV exposure can cause clear casting resin to yellow over time. To mitigate this, use UV-resistant resins like epoxy or polyurethane, or apply a UV-protective topcoat after curing. Store finished pieces away from direct sunlight if possible.
4.Sealing Porous Materials
When embedding porous items like wood or fabric, seal them with a thin layer of resin or shellac beforehand. This prevents air from escaping into the resin during curing, which can cause bubbles or cloudiness.
Part 3: Conclusion
Mastering the use of clear casting resin opens up a world of creative possibilities, from preserving cherished memories to producing high-precision industrial components. By following the steps outlined in this guide—preparing materials, mixing resin accurately, pouring in layers, and curing properly—you can achieve professional-quality results every time. Remember to prioritize safety by working in a well-ventilated area and wearing protective gear, and don’t hesitate to experiment with pigments, embedments, and mold designs to unleash your creativity.
Clear casting resin is more than just a material; it’s a gateway to innovation and expression. Whether you’re a seasoned artist or a curious beginner, the techniques and tips shared here will empower you to harness the full potential of clear casting resin in your projects. So gather your supplies, prepare your workspace, and let your imagination flow—the world of clear resin casting awaits!