


 yomi@rulecomposite.com




how to make a marble resin table top
 Apr 27, 2025|
 View:2723
Creating a marble resin table top is a rewarding DIY project that combines the elegance of natural marble with the durability and versatility of epoxy resin. This fusion results in a sleek, customizable surface perfect for dining tables, coffee tables, or desks. Whether you’re a seasoned crafter or a beginner, this guide will walk you through the process of crafting a stunning marble resin masterpiece.
1.Gather Your Materials and Tools
Before diving into the project, ensure you have all the necessary supplies:
Epoxy resin (food-safe if the table will be used for dining).
Marble pigment powder or liquid dyes (white, gray, black, and gold for authentic veining).
Mixing cups, stir sticks, and a heat gun or propane torch (to eliminate bubbles).
Silicone mold or a sealed wooden frame (to contain the resin).
Protective gear (gloves, respirator, and safety goggles).
Sandpaper (120-grit to 2000-grit for polishing).
Polishing compound and a buffing cloth (for a glossy finish).
2.Prepare Your Workspace
Work in a well-ventilated, dust-free area with a consistent temperature (ideally 70–75°F or 21–24°C). Lay down a plastic sheet to protect surfaces from spills. If using a wooden frame, seal it with tape to prevent leaks. For a marble resin table top, the mold’s size should match your table base dimensions.
3.Mix the Resin and Create the Marble Effect
Step 1: Mix the Base Layer
Pour equal parts resin and hardener into a mixing cup. Stir slowly for 3–5 minutes to avoid bubbles. Divide the mixture into separate cups for coloring.
Step 2: Add Marble Pigments
Add white pigment to the largest batch for the base. For veins, mix gray, black, or gold into smaller portions. Pour the white base into the mold, tilting it to spread evenly.
Step 3: Craft the Veining
Use a heat gun to slightly cure the base (5–10 minutes). Then, drizzle the colored resin in thin, wavy lines to mimic marble veins. Twist a toothpick or skewer through the veins to blend colors subtly. For a marble resin look, avoid overmixing—uneven swirls add authenticity.
4.Eliminate Bubbles and Cure the Resin
Pass a heat gun or propane torch 2–3 inches above the surface to pop bubbles. Repeat every 15 minutes for the first hour. Cover the mold with a box to shield it from dust. Let it cure for 24–72 hours (check the resin manufacturer’s instructions).
5.Demold, Sand, and Polish
Once cured, gently flex the mold or pry the edges to release the marble resin top. Use coarse sandpaper (120-grit) to flatten uneven edges, then progress to finer grits (220, 400, 800, 1200, and 2000) for a glass-like finish. Apply polishing compound with a buffing cloth for extra shine.
6.Attach the Table Top to the Base
Secure the cured marble resin slab to your table base using adhesive or screws. For a floating effect, leave a slight overhang. Ensure the base is level to prevent wobbling.
7.Maintain Your Marble Resin Table Top
Wipe spills immediately with a damp cloth and avoid abrasive cleaners. Apply a non-yellowing sealant annually to preserve the gloss.
Conclusion
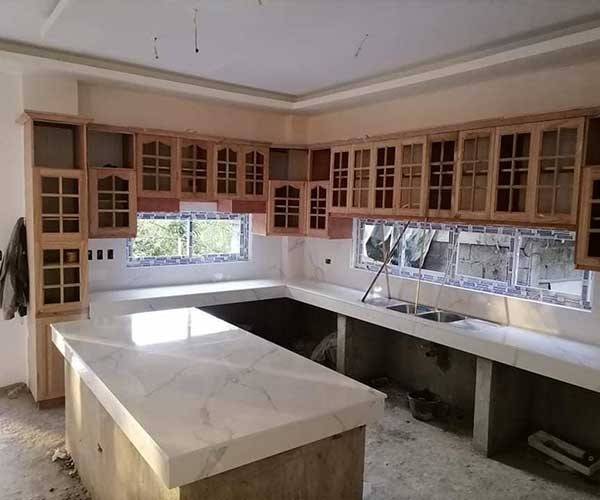
Crafting a marble resin table top is a blend of artistry and precision. By following these steps—from mixing resin to achieving realistic veining—you can create a luxurious, one-of-a-kind piece. The beauty of marble resin lies in its adaptability: customize colors, veining patterns, and size to match your décor. With patience and practice, your DIY marble resin table top will become a focal point in any room, embodying both elegance and durability. Whether for personal use or as a gift, this project proves that stunning design is within reach—no marble quarry required!