



 yomi@rulecomposite.com




How to use marine resin
 Jun 30, 2026|
 View:492
To use marine resin, follow these steps. You want a tough and reliable finish, so pick a high-performance product like Rule Composite Marine Resin. This resin stands up to saltwater, UV rays, and chemical exposure. You get superior adhesion on fiberglass, wood, and metal. Rule Composite Marine Resin meets top standards, including ISO 9001:2015 and ASTM E84. Check out some certifications below:
Certification/Standard | Description |
|---|---|
ISO 9001:2015 | Quality Management System Certificate |
ASTM E84 | Flame Spread & Smoke Developed Test Report |
Whether you build boats or fix them, you can handle this process with confidence.
Key Takeaways
Choose high-performance marine resin like Rule Composite Marine Resin for durability against saltwater and UV rays.
Prepare surfaces thoroughly by cleaning, sanding, and masking to ensure strong adhesion and a smooth finish.
Mix resin and hardener accurately, following the recommended ratios to avoid sticky or brittle results.
Apply resin using the best method for your project, whether it's hand lay-up, spraying, or vacuum bagging.
Always prioritize safety by wearing protective gear and working in a well-ventilated area to avoid fumes and splashes.
Materials & Tools
What You Need
You want to get the best results with marine resin, so having the right materials and tools makes a big difference. Here’s a handy table to help you pick the best method for your project:
Method | Best For | Pro Tips |
|---|---|---|
Airless Spraying | Large surfaces (hulls, decks), thick coatings | Keep the spray gun 30-60 cm from the surface. Use overlapping strokes for a smooth finish. |
Brushing | Small areas, edges, complex shapes | Use a natural bristle brush. Work the resin into crevices to prevent trapped air. |
You also need some basic supplies:
Sandpaper (180-220 grit for new wood, 80-120 grit for old paint or gelcoat)
Abrasive blasting tools or grinders for steel and aluminum
Mixing containers and stir sticks
Protective gloves, safety glasses, and a respirator for organic vapors
Masking tape and drop cloths
Tip: Always work in a well-ventilated area. Safety gear protects you from fumes and splashes.
For prepping surfaces, sand fiberglass and wood to create a rough texture. If you work with steel, abrasive blasting removes rust and old coatings. Grinding is a good backup if blasting isn’t possible.
Choosing Marine Resin
Picking the right marine resin for your project is important. You want to look at cure time and pot life, which tells you how long you have before the resin starts to harden. Check the cure profile so you know when you can sand or finish the surface. Environmental conditions like temperature and humidity affect how fast the resin cures, so plan ahead.
Certifications matter, too. Make sure your resin meets safety and environmental standards. Rule Composite Marine Resin is a great choice because it’s certified and designed for tough marine environments. Think about what your project needs—strength for hardware bonding or flexibility for underwater repairs.
Store your resin in a cool, dry place. Keep containers sealed and away from sunlight and moisture. This keeps your resin fresh and ready for action.
Surface Prep
Clean & Dry
You want your marine resin to stick and last, so start with a spotless surface. Even the best resin can fail if you skip this step. Oil, grease, or dust can cause leaks and weak spots. Here’s how you get it right:
Remove dirt and grease. Use a detergent solution or a cleaning agent. For metal, grab a degreasing solvent.
Scrape off loose paint and rust. Wire brushes, sandpaper, or power tools work well, depending on the material.
Fix cracks and holes. Fill them with putty or filler. Sand the area smooth.
Dry the surface completely. Moisture ruins adhesion. Control the temperature and humidity in your workspace.
Tip: If you work in a humid area, use fans or heaters to speed up drying. Water and resin don’t mix!
Sand & Mask
Sanding gives your surface the grip it needs for Rule Composite Marine Resin. You want to use the right tools and techniques for the job. Check out this table for some options:
Sanding Technique | Description |
|---|---|
Different grits of sandpaper | Start with coarse, finish with fine for a smooth, ready surface. |
Wet sanding | Saves sandpaper and keeps dust down. Use water for a cleaner finish. |
Custom sanding blocks | Foam or wood blocks help you reach tricky spots and curves. |
Orbital sanding machine | Perfect for big areas, especially underwater surfaces. |
Mirka Abranet system | Lets you vacuum dust through the pad, so you avoid clogging. |
Masking keeps resin where you want it. You don’t want sticky surprises on hardware or trim. Here’s what works best:
High-quality masking tape: Covers parts you don’t want coated. You get sharp, clean lines.
Butyl tape: Seals holes and gaps. It’s flexible and waterproof, so it lasts.
Take your time with prep. Clean, dry, sand, and mask. You set yourself up for a strong, waterproof finish that stands up to saltwater and sun.
Mixing Marine Resin
Measure & Combine
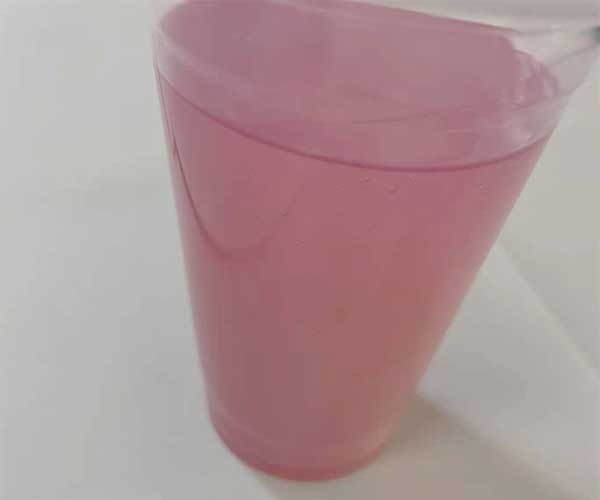
You want your marine resin to perform at its best, so start with careful measuring. Grab a clean container and a digital scale. Check the product label for the recommended resin-to-hardener ratio. Rule Composite Marine Resin makes this step easy with user-friendly mixing ratios. You don’t have to guess or estimate. Accurate measurement helps you avoid sticky finishes or brittle surfaces.
Pour the resin first. Add the hardener next. If you notice the mixture feels thick, you can add a small amount of propylene carbonate. This lowers viscosity and makes the resin flow better. You get a smoother blend and easier application. High viscosity can make mixing tough and lead to uneven coating. Lower viscosity means you can work faster and cover surfaces more evenly.
Tip: Always use separate containers for measuring and mixing. This keeps your ratios precise and prevents contamination.
Mixing Tips
Mixing marine resin takes patience and attention. You want every strand blended, so the resin cures strong and waterproof. If you rush or skip steps, you risk problems like soft spots or brittle patches. Here’s how you get it right:
Check the ratio on the label before you start.
Measure both resin and hardener with clean containers.
Stir slowly and thoroughly. This reduces bubbles and ensures even mixing.
Scrape the sides and bottom of your mixing cup. Don’t leave unmixed material behind.
For critical jobs, transfer the mixture to a second clean cup and mix again.
Apply the resin within the working time listed on the package.
If you don’t mix thoroughly, you can run into trouble. Here’s what can happen:
Surfaces may turn brittle and absorb water.
The finish might stay sticky and never cure.
Over-curing can cause cracks and stress inside the material.
You can avoid these issues by following best practices:
Use a digital scale for precise measurement.
Stick to the manufacturer’s mixing instructions.
Mix slowly and scrape every part of the container.
Don’t guess the amounts.
Work in the recommended temperature range.
Note: Take your time. Mixing well gives you a strong, durable finish that stands up to saltwater, sun, and chemicals.
Rule Composite Marine Resin’s low viscosity makes mixing easier. You don’t have to fight thick, sticky resin. The blend flows smoothly, so you can cover fiberglass, wood, or metal without hassle. You get a reliable, waterproof barrier every time.
Applying Marine Resin

Application Methods
You have a few ways to apply marine resin, and each method works best for certain projects. Let’s look at the main options:
Hand Lay-Up
This method is simple and great for repairs or small builds. You use a brush or roller to spread the resin over fiberglass, wood, or metal. You can layer fiberglass cloth and add more resin as you go. Hand lay-up gives you control and helps you reach tight spots.Spraying
If you need to cover large surfaces, spraying saves time. You use an airless spray gun to apply marine resin in even coats. Keep the gun moving and overlap your strokes. Spraying works well for boat hulls, decks, or big panels. You get a smooth finish and can cover tricky shapes.Vacuum Bagging
This method is for advanced projects. You lay down your materials, apply marine resin, and seal everything in a vacuum bag. The vacuum pulls out air and presses the layers together. You get strong, lightweight parts with fewer bubbles. Vacuum bagging is popular for building high-performance boats.
No matter which method you pick, you get superior adhesion. Marine resin sticks to fiberglass, wood, and metals. It forms a waterproof barrier that protects your boat from leaks and corrosion. You can trust the bond to last, even in harsh conditions.
Tip: Always follow the manufacturer’s instructions for your chosen method. You get the best results when you use the right tools and techniques.
Bubble Removal
Bubbles can ruin your finish, so you want to get rid of them before the resin cures. Here are some best practices to help you achieve a smooth, professional look:
Use a Heat Gun or Torch
Hold the heat gun or torch about 3–5 inches above the surface. Sweep slowly to pop bubbles. Do this within the first 5–10 minutes after pouring.Warm the Resin Before Mixing
Place the closed bottles of resin and hardener in warm water for 10 minutes. This helps trapped air escape and makes mixing easier.Let the Resin Sit After Mixing
After you mix, let the resin rest for 2–5 minutes. Bubbles rise and pop naturally during this time.Use a Toothpick or Needle for Surface Bubbles
If you see bubbles on the surface, poke them with a toothpick or needle while the resin is still fluid. This works well for small projects.Pour in Thin Layers
Pour no more than 1/8″ to 1/4″ thick at a time. Thin layers allow bubbles to escape and help the resin self-degas.Use a Vacuum or Pressure Pot (Advanced)
For professional work, use a pressure pot to compress air bubbles or a vacuum chamber to remove them before curing.
Note: Take your time with bubble removal. A smooth finish looks better and lasts longer.
You can use these tips to make sure your marine resin cures strong and clear. Bubbles are easy to handle if you pay attention and use the right tools.
Curing & Finishing
Curing Time
You want your project to last, so let the resin cure fully. Curing means the resin hardens and reaches its strongest state. The time it takes depends on temperature and humidity. Warm air speeds up the process. If the temperature rises by 18°F (10°C), the resin can cure twice as fast. Cold weather slows things down, so check the forecast before you start.
Humidity also matters. High humidity can cause problems like sticky spots or a cloudy finish. Some resins work best at 30-40% humidity, while others need even drier air. Try to keep your workspace dry and stable. If you see sticky areas, the air might be too damp. Use fans or a dehumidifier if needed.
Tip: Always check the label for the recommended curing time and conditions. Don’t rush the process. Let the resin cure completely before sanding or polishing.
Sanding & Polishing
Once the marine resin cures, you can sand and polish for a smooth, shiny finish. Start with coarse sandpaper to level the surface, then move to finer grits for a silky feel. Here’s a simple step-by-step guide:
Start with 320-grit sandpaper. Knock down any high spots until the surface feels even.
Switch to 600-grit. This removes deeper scratches left by the first sanding.
Move up to 800-grit. Smooth out the marks from the 600-grit paper.
Finish with 1200-grit or higher. You’ll get a soft, hazy shine that’s ready for polishing.
If you need to shape the surface more, you can start with 80-grit, then use 120-grit, and finish with 220-grit before moving to finer papers.
After sanding, use a polishing compound and a soft cloth. Rub in circles until the surface shines. Take your time. A good polish makes your work look professional and helps protect it from the elements.
Note: Always wear a mask and goggles when sanding. Fine dust can be harmful if you breathe it in.
Safety & Troubleshooting
Safety Precautions
When you work with marine resin, safety comes first. You want to protect yourself from fumes, splashes, and dust. Here are some simple steps to keep you safe:
Wear nitrile gloves (8–15 mil thick) to keep resin off your skin.
Put on Tyvek disposable coveralls for full-body protection, especially during fiberglass work.
Always use safety goggles to shield your eyes from splashes and dust.
Make sure your workspace has good ventilation. Open windows or use fans to move air out.
Use a respirator with an organic vapor cartridge. Store the cartridges in airtight containers when not in use.
Keep an eyewash station nearby in case you get resin in your eyes.
Resin fumes can cause skin irritation, breathing problems, and eye discomfort. You can avoid these issues by wearing the right gear and working in a well-ventilated area.
Tip: Never skip safety gear, even for small jobs. It only takes a second for an accident to happen.
Common Mistakes
You want your project to turn out great, so watch out for these common mistakes:
Not cleaning or sanding the surface enough. Dirt or smooth spots can stop the resin from sticking.
Mixing the wrong ratio of resin and hardener. This can make the resin weak or sticky.
Rushing the mixing process. If you don’t mix well, you might get soft spots or bubbles.
Take your time with each step. Always follow the instructions on the label.
Troubleshooting
Sometimes things don’t go as planned. If you see bubbles or the resin doesn’t cure right, try these steps:
Use a heat gun or torch. Hold it 6–8 inches above the surface and move in circles to pop bubbles.
For stubborn bubbles, use a toothpick or pin to pop them.
If you use a silicone mold, spray a little isopropyl alcohol to help bubbles rise.
After curing, sand rough spots with 220–400 grit sandpaper.
Wipe away dust with isopropyl alcohol before adding another layer.
Pour a thin flood coat of resin to finish the repair.
When you finish your project, remember that unused resin and cleaning tools can be toxic, flammable, or corrosive. Check out this table for safe disposal:
Category | Description |
|---|---|
Toxic | Can harm your health or the environment. |
Flammable | Can catch fire easily. |
Corrosive | Can damage materials or skin on contact. |
Store leftovers safely and take them to a hazardous waste collection site.
You can achieve a strong, lasting finish with marine resin if you follow a few key steps. Here’s what experts recommend:
Prepare surfaces by cleaning and sanding until they shine.
Mix and apply resin carefully, adjusting your speed to avoid water intrusion.
Test a small area before you start the full job.
You might wonder about gel coat repairs or choosing the right hardener. Always check the instructions and ask questions if you’re unsure. Trust Rule Composite Marine Resin for reliable results every time.
FAQ
How long does Rule Composite Marine Resin take to cure?
You usually see the resin harden in 6–8 hours. Full strength comes after 24 hours. Always check the label for exact times. Warm air speeds up curing.
Can I use marine resin on metal surfaces?
Yes, you can use Rule Composite Marine Resin on metals like steel and aluminum. The resin sticks well and creates a waterproof barrier. Make sure you clean and sand the metal first.
What should I do if the resin stays sticky?
If your resin feels sticky, you probably mixed the wrong ratio or worked in high humidity. Try sanding the area and applying a new layer. Always follow the mixing instructions.
Is marine resin safe for underwater repairs?
You can use Rule Composite Marine Resin for underwater repairs. It resists water, salt, and chemicals. Make sure you prep the surface and let the resin cure fully before putting it back in the water.
How do I store leftover marine resin?
Store leftover resin in a cool, dry place. Keep the container tightly closed. Avoid sunlight and moisture. You can use a shelf or cabinet for safe storage.